DOIT VISION
/
BLOG
/
LED Circular Display Buying Guide 2026: Diameter, Pixel Pitch, Installation & Cost
Buying a circular LED display means making four decisions — in the right order. Diameter first (it is a physical constraint you cannot change). Then pixel pitch (determined by viewing distance). Then framed vs frameless (aesthetics vs image quality vs installation). Then installation method (your venue decides). This guide walks through each decision, with real project data from 30+ installations across 55 countries. New to circular LED displays? Start with our Circular LED product page. Need a hollow halo instead of a solid disc? See Ring vs Circular vs Cylinder first.
Key Takeaways
- You need to make four decisions — and the order matters. Diameter comes first because it is a physical constraint. Pixel pitch comes next because it depends on viewing distance. Framed vs frameless comes third because it affects both visual quality and installation difficulty. Installation method comes last because it depends on your venue and the three decisions before it.
- For diameter, the rule of thumb: your display diameter should be roughly 1/3 to 1/2 of the closest viewing distance. A 1m diameter display works well at 2–3 metres; a 2–3m display suits 6–10 metres.
- For pixel pitch, the rule is simpler: pixel pitch (in mm) ≈ minimum viewing distance (in metres). P2.5 looks crisp at 2.5m and beyond. Buying P1.5 for a display that will be viewed from 4m away means you paid for resolution nobody can see.
- For framed vs frameless: framed delivers better image quality, easier installation, and lower cost. Frameless offers a floating-disc aesthetic at 30–50% higher cost — but straight lines in your content will appear wavy at module seams. For the majority of projects, framed is the better engineering choice.
- Prices in this guide are based on 30+ circular LED projects completed by DOIT VISION between 2023 and 2025 across 55 countries.
01 — The 4 Decisions
The Four Decisions You Need to Make — In Order
If you have never bought a circular LED display before, the process can feel unstructured. Unlike a standard rectangular LED screen where you mostly pick a size and a pixel pitch from a catalogue, a circular display is a custom-engineered project. You are not picking from a shelf — you are specifying a build.
There are exactly four decisions. The order is not arbitrary — each decision constrains the ones after it.
Decision 1 — Diameter
- → This is a physical constraint — the space you are installing into determines what fits
- → Changing diameter after production means starting over. Get this right first
- → Rule of thumb: diameter ≈ 1/3 to 1/2 of closest viewing distance
Decision 2 — Pixel Pitch
- → Depends directly on viewing distance — you cannot choose pixel pitch until you know how close viewers will stand
- → Rule of thumb: pixel pitch (mm) ≈ minimum viewing distance (m)
- → Going finer than necessary wastes budget — going coarser than necessary makes the display look pixelated
Decision 3 — Framed vs Frameless
- → This affects visual quality, installation difficulty, and cost all at once
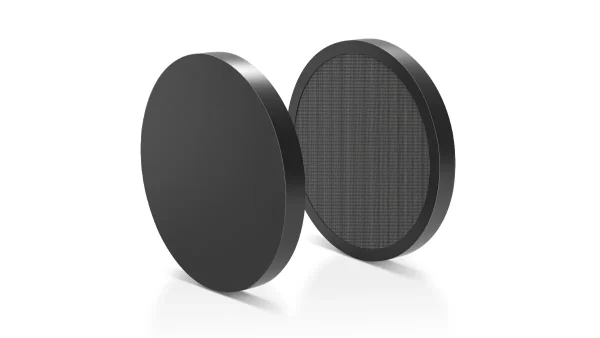
- → Framed = standard square modules behind a metal ring covering the jagged edges. Better image quality, easier installation, lower cost
- → Frameless = custom fan-shaped modules forming a true circle. More aesthetic from the side, but straight lines in content appear wavy at module seams
Decision 4 — Installation Method
- → Depends on your venue: wall, ceiling, floor, truss, or cable suspension
- → Installation difficulty varies dramatically — wall mounting is 2–4 hours; ceiling-suspended frameless is 6–8+ hours
- → The installation method must be confirmed before production — the rear mounting points and cable routing are customised to match
The next four sections walk through each decision in detail. By the end, you will have a complete specification ready to send to a supplier for an accurate quote.
The Most Common — and Most Expensive — Mistake
We have seen clients order P1.25 circular LED displays for installations where the closest viewer is 5 metres away. At 5 metres, the human eye cannot distinguish individual pixels at P2.5 — let alone P1.25. That client paid roughly 2.5× the necessary hardware cost for 640,000 pixels per square metre that literally nobody in the venue could see. The money would have been better spent on a larger diameter or a more elaborate mounting structure. Before you commit to a pixel pitch, measure the actual closest viewing distance in your venue and apply the rule: pixel pitch (mm) ≈ minimum viewing distance (m).
02 — Diameter
Decision 1: What Diameter Do You Need?
Diameter is the first question, and the one buyers most frequently get wrong. The two common mistakes: going too small (the display disappears in the space and looks like a wall clock) or going too large (it overwhelms the architecture and inflates the budget without adding proportional impact).
The practical rule: your display diameter should be roughly 1/3 to 1/2 of the closest viewing distance. If people will stand 6 metres away, a 2–3 metre diameter display looks proportional. If they will stand 1.5 metres away — a retail window, a reception counter — a 0.5–0.8 metre display is more appropriate.
| Venue |
Typical Viewing Distance |
Recommended Diameter |
| Luxury retail window / reception counter |
1–2m |
0.5–1.0m |
| Brand flagship store |
2–4m |
1.0–1.5m |
| Corporate lobby / hotel reception |
3–6m |
1.5–2.5m |
| Shopping mall atrium |
5–10m |
2.0–3.5m |
| Stage backdrop / event production |
8–15m |
2.5–4.0m |
| Building facade (outdoor) |
15–50m |
4.0–6.0m+ |
Standard vs Custom Diameter
Standard diameters (0.5m, 1.0m, 1.5m, 2.0m, 2.5m, 3.0m) use existing PCB designs and ship in 25–30 days. Custom diameters require a new PCB layout and prototype run, adding 15–30 days to production time and a one-time engineering fee. If budget or timeline is tight, ask your supplier which standard diameters are in current production — you may be able to adjust your specification to a standard size without meaningfully affecting the visual result.
03 — Pixel Pitch
Decision 2: Which Pixel Pitch?
Pixel pitch is the distance between the centres of two adjacent LED diodes, measured in millimetres. It determines how sharp your content looks at a given viewing distance. Smaller pitch = sharper image = higher cost. Larger pitch = softer image at close range = lower cost.
The rule is straightforward: pixel pitch (mm) × 1 ≈ minimum viewing distance (m). P2.5mm looks crisp at 2.5 metres and beyond. P1.5mm looks crisp at 1.5 metres. P1.25mm looks crisp at 1.25 metres.
| Pixel Pitch |
Min Viewing Distance |
Pixel Density |
Best For |
Cost Level |
| P1.25 |
1.25m |
640,000 px/m² |
Luxury retail, museum exhibits, close-up viewing |
$$$$$ |
| P1.5 |
1.5m |
422,000 px/m² |
Flagship stores, high-end corporate lobbies |
$$$$ |
| P1.875 |
1.875m |
288,000 px/m² |
Hotel lobbies, premium commercial spaces |
$$$ |
| P2.5 |
2.5m |
160,000 px/m² |
Shopping malls, stage backdrops, exhibitions |
$$ |
| P3–P4 (Outdoor) |
3–4m |
111,000–62,500 px/m² |
Semi-covered plazas, outdoor retail, stadiums |
$$$ |
| P5–P6 (Outdoor) |
5–6m |
40,000–28,000 px/m² |
Building facades, public squares, long-distance signage |
$$ |
Quick Tool — Verify Pixel Pitch with Our Free Calculator
Enter your viewing distance into our LED display calculator. It instantly recommends the right pixel pitch, plus screen size, cabinet count, and power estimates — five tools in one page. Use it to confirm your pitch decision before you order.
“A P1.25mm display has 640,000 LEDs per square metre. A P2.5mm display has 160,000 — one quarter as many. If your viewers are never closer than 3 metres, you are paying for 480,000 LEDs per square metre that nobody will ever see.”
The most common mistake in circular LED procurement is over-specifying pixel pitch. For retail stores and hotel lobbies where viewers stand 3–6 metres away, P2.5 delivers the best cost-to-visibility ratio. Finer pitches are worth the premium only when viewers will be within 2 metres of the screen — luxury retail counters, museum exhibits, high-end showrooms.
04 — Framed vs Frameless
Decision 3: Framed or Frameless?
This is the decision where aesthetics and engineering collide. Both approaches produce a working circular LED display — but the trade-offs go far deeper than how the edge looks.
Framed (with edge cover)
- → Standard square modules are arranged inside the cabinet. A metal ring is attached over the front surface, covering the jagged edges where module corners protrude past the circle boundary
- → Image quality is identical to a premium rectangular LED wall — pixels sit on a perfect x/y grid, so straight lines in your content remain straight
- → Installation is simpler: the metal ring provides mechanical registration points, and minor module misalignments are hidden behind the ring
- → Cost: baseline. For a 1m P2.5 indoor display, approximately $2,500–$3,000
Frameless (without edge cover)
- → Custom fan-shaped PCB modules connect directly to form the circular surface. There is no metal ring — LEDs extend to the extreme perimeter, creating a floating-disc visual effect
- → Image quality is compromised: the radial pixel layout in fan-shaped modules means straight lines in your content will appear wavy at module seams. This is not a calibration issue — it is structural
- → Installation is significantly harder: every 1mm module alignment error shows directly as a visible seam. For ceiling-suspended installations, the adjustment process is particularly difficult
- → Cost: 30–50% premium. For a 1m P2.5 indoor display, approximately $3,500–$4,500
We Learned This the Hard Way
On a 3-metre P2.5 frameless ceiling-suspended installation in Bangkok, stronger magnets — specified to eliminate any risk of modules detaching overhead — became the mechanism that damaged the display. The increased holding force made modules extremely difficult to remove during the repeated alignment-adjustment cycles frameless installation demands. 13 out of 52 LED modules (25%) were physically damaged during the alignment process — cracked PCB corners, chipped LED diodes, and bent connector pins. We had to dispatch an engineer from Shenzhen to Bangkok specifically for on-site module replacement and re-alignment, adding 5 extra days and approximately $2,800 in unplanned travel and labour costs. For the majority of projects, framed is the better engineering choice.
→ Read the full engineering comparison: Framed vs Frameless Circular LED Displays
05 — Installation Method
Decision 4: Which Installation Method?
Your venue determines the installation method, and the installation method determines the rear mounting point configuration on the display — which is why this decision must be confirmed before production starts. There are five methods, ranked easiest to hardest.
| Method |
Install Time |
Best For |
Frameless Risk |
| Floor Standing |
1–2 hrs |
Trade shows, exhibitions, pop-ups |
Low |
| Wall Mounting |
2–4 hrs |
Retail stores, conference rooms, lobbies |
Low |
| Truss Mounting |
2–3 hrs |
Concerts, events, stage backdrops |
Medium |
| Cable Suspension |
4–6 hrs |
Galleries, temporary suspended displays |
High |
| Ceiling Suspension |
6–8+ hrs |
Mall atriums, hotel lobbies, landmark displays |
Highest |
The back of a circular LED display is structurally similar to a standard iron-cabinet LED screen — it has cable entry holes, screw mounting points in M8 or M10 size, and the hole positions can be customised. The key difference is that you must tell the factory how you plan to install the display before production begins, because the rear mounting hardware is configured to match your chosen method.
→ Read the full installation guide: 5 Methods with Engineering Requirements
06 — Cost
What Should a Circular LED Display Cost?
A circular LED display costs more than a rectangular display of the same pixel area — typically 20–50% more, attributable to custom structural fabrication and non-standard panel configuration. The table below gives real price ranges for common indoor configurations, all EXW Shenzhen factory gate in USD.
| Configuration |
Price Range (USD) |
Notes |
| P2.5, 1m diameter, indoor, framed |
$2,500 – $3,000 |
Most popular configuration — best value |
| P1.5, 1m diameter, indoor, framed |
$4,000 – $5,100 |
High resolution for close viewing |
| P2.5, 2m diameter, indoor, framed |
$8,000 – $12,000 |
Common for atriums and hotel lobbies |
| P2.5, 1m diameter, indoor, frameless |
$3,500 – $4,500 |
30–50% premium over framed |
| P4, 2m diameter, outdoor, IP65, framed |
$8,000 – $11,000 |
IP65 waterproofing and high brightness |
All prices above are EXW Shenzhen — hardware cost only. Budget an additional 15–25% for shipping, import duties, and local installation labour. For a $10,000 display, the landed-and-installed cost is typically $12,000–$13,000 depending on destination.
→ Read the full price guide: How Much Does a Round LED Screen Cost?
07 — Checklist
Checklist Before You Order
Before you send a purchase order to your supplier, confirm all nine items below. Each one represents a decision point that, if missed, will require a change order — or a conversation with your client about why the budget or timeline just shifted.
-
Diameter confirmed
Have you measured the installation space and confirmed the closest viewing distance? The diameter should be 1/3 to 1/2 of that distance. Standard diameters ship faster and cost less than custom sizes.
-
Pixel pitch selected
Does your pixel pitch match your minimum viewing distance? P2.5 is the sweet spot for 2.5m+ viewing. Finer pitches than your distance requires are wasted money.
-
Framed or frameless decided
Framed = better image quality, easier installation, lower cost. Frameless = more aesthetic from the side, 30–50% premium, straight lines in content will appear wavy at module seams. For most projects, framed is the better choice.
-
Installation method chosen
Wall, ceiling, floor, truss, or cable — the method must be confirmed before production because the rear mounting points and cable routing are configured to match.
-
Indoor or outdoor confirmed
Outdoor requires IP65 waterproofing, 5,000+ nit brightness, and anti-corrosion treatment on the frame. These add 30–50% to the cost of an equivalent indoor configuration.
-
Single or double-sided
Double-sided costs approximately 1.8× the single-sided price. Each side operates independently with its own receiving card. Only choose double-sided if viewers approach from both directions — a wall-mounted display facing one direction does not need a second screen on the back.
-
Content source planned
Synchronous operation (HDMI feed from a PC or media server) vs asynchronous (standalone playback from USB or WiFi). This determines which control system and receiving card are specified.
-
Power and data access
Is there a power outlet and data connection at the installation point? Circular displays draw 170–510W per square metre. Confirm your circuit has capacity and the cable route from source to display is feasible.
-
CAD drawing received
Has your supplier provided a CAD mockup with exact dimensions, mounting points, and module layout before you committed? If not, ask for one. A reputable supplier provides engineering documentation — not a brochure image.
Ready to Get a CAD Mockup and Formal Quote?
Tell us your four decisions — diameter, pixel pitch, framed or frameless, and installation method. Our engineering team will return a 3D CAD visualisation and a formal quote within 24 hours. Same-day response during Shenzhen business hours.
Get CAD & Quote →
- Manufacturer
- DOIT VISION
- Author
- Kris Liang, Co-Founder
- Author Experience
- 19 years LED engineering
- Content Type
- Article — Buying Guide
- Primary Topic
- Circular LED Display Buying Guide: Diameter, Pixel Pitch, Framed vs Frameless, Installation & Cost
- Date Published
- July 2026
- Date Reviewed
- July 2026
- Industries
- LED Display, AV Integration, Creative LED, Circular LED
- Certifications
- CE, FCC, RoHS, CB
- Countries Served
- 55+
Kris Liang
Co-Founder, DOIT VISION
19 years LED display industry experience, 55+ countries served, last reviewed July 2026
 All-in-One COB LED TV
  Flexible LED Displays
  Transparent LED Displays
  Led Poster
  Circular LED Displays
  Creative & Custom LED Displays