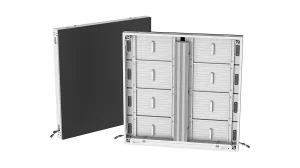
Square 1000 series
The 1000 mm outdoor cabinet when the steel is already a metre grid and you still need finer pitches....
- Format
- 1000 × 1000 mm
- Pitch
- P2.97–P10.41
- Service
- Front / rear
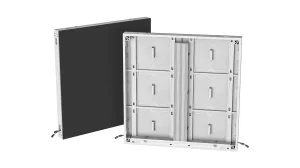
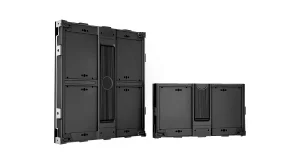
Free product drawings · Steel-structure CAD · Wiring & installation guidance
Start with your project need. Both Square series serve fixed outdoor advertising; cabinet layout and content help decide between them.
The 1000 mm outdoor cabinet when the steel is already a metre grid and you still need finer pitches....
The 960 mm outdoor cabinet when the steel is already a 960 grid. Verified size is 960×960×64 mm at 2...
The outdoor member of the Fine Pitch family — not a Square billboard cabinet and not an indoor COB w...
Cabinet sizes shown are standard formats. Highlights are starting points;confirm daylight, content and the complete installation before ordering.
Match the cabinet system to the structure, then compare the pitch and brightness for the audience.
Swipe the table to compare all three series.
| Compare | Square 1000 | Square 960 | FO Series |
|---|---|---|---|
| Starting point | Larger fixed screens on a metre-based grid | Larger fixed screens on a 960 mm grid | Close-view outdoor signs and detailed content |
| Pixel pitch |
P2.97P3.91P4.81P6.25P7.81P10.41
|
P4P5P5.71P6.67P8P10
|
P1.25P1.5P1.875P2.5
|
| Standard cabinet W × H | 1000 × 1000 mm | 960 × 960 mm | 480 × 540 mm |
| Standard brightness | P2.97: 6,000 nits P3.91 / P4.81: 5,500–6,500 nits P6.25 / P7.81 / P10.41: 6,500 nits |
P4 / P5: 5,500 nits P5.71 / P6.67 / P8 / P10: 6,500 nits |
P1.25 / P1.5 / P1.875: 4,000 nits P2.5: 3,500 nits |
| Front / rear protection | IP65 / IP65 | IP65 / IP65 | IP66 / IP66 |
| Service access | Front / rear | Front / rear | Front |
| Other cabinet formats W × H | 1000 × 500 / 1000 × 750 mm 1500 × 1000 mmConfirm the pitch and cabinet mix for your layout. |
960 × 640 mmConfirm the pitch and cabinet mix for your layout. | Plan around 480 × 540 mmConfirm finished depth with the mounting design. |
| Settle before ordering | Cabinet mix, selected brightness and access side | Finished size, selected pitch and access side | Smallest text, daylight and reachable front service |
Daylight and detail are separate decisions. FO’s finer pitch can help at close range. Compare its actual brightness with the sun exposure; a smaller pixel pitch does not establish daylight suitability.
Design the service route with the wall. Confirm access to modules, power supplies and receivers, plus frame depth, ventilation and cable space.
A six-cabinet-wide, three-cabinet-high screen has different dimensions in the two standard Square formats. Start with the measured opening before choosing a grid.
Plan screen dimensionsCalculated from 1000 × 1000 mm and 960 × 960 mm cabinets. Cabinet-layout schematics at the same scale; mounting clearances are additional. Other formats require a separate layout.
Product drawings, steel-structure CAD, wiring diagrams and installation instructions—all provided free for your outdoor project.
Outdoor projects involve the screen, its support, power and access. We provide the engineering documents free of charge, based on your site and selected configuration.
Installation accessories supplied. Mounting plates, screws and other fixing accessories are provided for the project configuration. We agree the accessory list with your installation plan.
Discuss drawings & installationStructure and signal drawings from the same outdoor project. Your documents are prepared for your screen layout and installation.
View drawing
Front, side and top views with mounting dimensions and connection details.
View drawing
Controller connections and CAT6 cable routes, mapped to the cabinet layout.
Your order includes test videos, FAT inspection records, packing photos, and spare-parts photos with a list. Square 1000 and Square 960 also carry CE, EMC, RoHS and CB documentation.
Explore manufacturingBring these details into the project review before the cabinet list is final.
Mark the nearest and furthest regular viewers, their viewing angle and whether they walk or drive past. Test your smallest text with the proposed resolution. Short roadside messages and close-view product imagery need different content layouts.
Record orientation, direct-sun hours, local temperature and ventilation. Review brightness at the hardest daytime condition and specify night settings separately. Confirm the brightness-control equipment with the quote; do not assume an ambient sensor is included.
Send the wall or pole structure, available depth, cable entries and access route. Agree the complete installed load and support with the project team. Include drainage and service space; front access and a cabinet IP rating each describe only part of the installation.
Compare the selected configurations at the same brightness and content assumptions. Separate estimated energy use from maximum supply requirements. Add the processor and other equipment, then agree spare parts and the practical replacement route before calculating operating cost.
Start with the audience and installation. Square 1000 and Square 960 are starting points for larger fixed billboards and façades; compare their cabinet grids, available pitches and finished dimensions. FO Series offers P1.25 to P2.5 for closer viewing and detailed content. Check the selected model’s brightness against the site exposure, then confirm the structure and service route. For repeated event assembly, explore the Rental LED range.
Choose pixel pitch using screen size, the nearest regular viewer and the smallest important content. A pedestrian sign and a roadside billboard have different reading conditions. Review a content sample at the proposed pixel resolution and intended distance; also consider viewing angle and how long people see the message. A distance rule is only a starting estimate. Confirm the cabinet layout before finalising the total pixel count.
Match brightness to direct sun, orientation, shading and operating hours. Standard Square configurations range from 5,500 to 6,500 nits depending on pitch; FO is 4,000 nits at P1.25, P1.5 and P1.875, and 3,500 nits at P2.5. Send site photos taken during the brightest operating period. Agree daytime and nighttime settings, the control method and any project lighting requirements before the configuration is final.
Compare the rating on both sides of the selected cabinet, then review the complete installation. Square 1000 and Square 960 list IP65 front and rear; FO lists IP66 front and rear. Weather exposure also affects cable entries, drainage, mounting and service procedures. Share rain exposure, coastal conditions and operating temperatures so these details can be reviewed. An IP rating alone does not specify the whole site design.
Choose the service route before fixing the mounting depth. Square 1000 and Square 960 support front or rear service; FO is front-service. Check how a technician will reach modules, power supplies and control components, including any lifting equipment. Front service still needs working space in front of the screen and room for mounting, cables and ventilation. Confirm component access on a section drawing of the actual installation.
Use the selected SKU’s average power as an operating estimate and its maximum power when planning the electrical supply with your installer. Multiply average watts per square metre by screen area and operating hours, then divide by one thousand for estimated kilowatt-hours. Content and brightness settings change actual consumption. Add processing and other equipment, and compare configurations under the same operating assumptions before estimating a cost saving.
Compare the same active screen dimensions, pixel pitch, brightness configuration and installation scope. Ask for the cabinet layout, controller or processor, power distribution, cables, mounting items, spare modules, packing and delivery terms to be identified. Include local installation and access costs in the project budget. Send the site location, required date and budget range so the proposed configuration and responsibilities can be agreed before production.
Yes. DOIT VISION provides product drawings, steel-structure design CAD drawings, wiring diagrams and installation instructions free of charge for outdoor display projects. Mounting plates, screws and other installation accessories are supplied with the project configuration. Send the screen dimensions, installation height, site photos, existing structure, power location and service access so we can prepare the engineering documents and agree the accessory list for your installation team.
Almost every spec sheet for an outdoor LED display opens with a brightness claim — and the numbers h...
Read guide
The maintenance question for an outdoor LED display is not “which one is better” — it is...
Read guide
A per-square-metre price for an outdoor LED display is meaningless without the spec behind it — two ...
Read guideStart with a site photo and the screen dimensions. Share the details below so we can compare suitable products, plan the installation and prepare your free engineering documents.
info@doitvision.comProject guidance: DOIT VISION engineering team · Updated October 14, 2026
A drawing, a site photo or an early idea. Tell us what you are planning and work through the details with our engineering team.