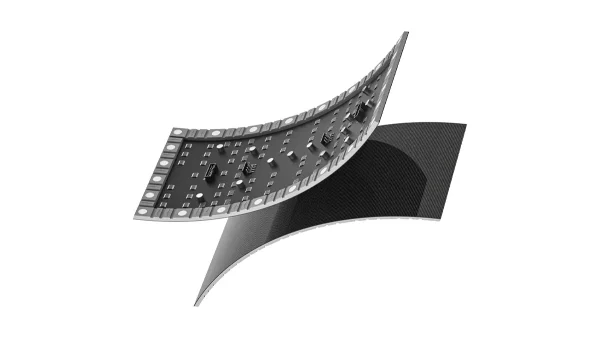
All-in-One COB LED TV
  Flexible LED Displays
  Transparent LED Displays
  Led Poster
  Circular LED Displays
  Creative & Custom LED Displays
 If you picture someone gluing hundreds of tiny LED modules to a curved wall one by one, you’re not alone — most buyers have the same fear. Two clean assembly paths exist: frame + magnetic snap-on modules, and pre-assembled cabinets that bolt together. Both are simpler than you expect, with real project examples from Portugal and the US.

- Flexible LED assembly isn’t a thousand-module sticker puzzle. Two clean paths exist: frame + magnetic snap-on modules, and pre-assembled cabinets that bolt together
- The Portugal P1.5 GOB cylinder — 1.53m diameter, 3.2m tall, 10 modules around — used Path A. A steel frame was fabricated, modules snapped on magnetically. Total module mounting time: under 3 hours for the full cylinder
- The US immersive LED tunnel used Path B: pre-assembled cabinets arrived from the factory, and the team bolted them together on site. No module-level work at all — just cabinet-to-cabinet signal and power
- Both paths eliminate the fear of individual module alignment. Alignment pins on every module edge ensure pixel-to-pixel registration automatically. You don’t eyeball this
The Fear Is Real — and It’s Wrong
Search “flexible LED installation” and you’ll see a hundred photos of someone mounting rectangular modules onto a flat steel wall. That’s a flat LED wall. You scroll further, see a curved screen, and think: “Someone had to bend every single module, somehow fix it to a frame, and make every module edge line up perfectly. I don’t have the people or the time for that.”
This is the single biggest reason projects stall at the quote stage. And it’s based on a misunderstanding of how flexible LED modules actually go together.
There are two assembly paths for flexible LED. Neither involves bending individual modules by hand and praying they align. Both have been done dozens of times. Both are documented with real projects below.
The key insight most buyers miss: flexible modules don’t create the curve — the frame does. The modules just follow whatever surface you give them. Get the frame right and the modules mount in minutes. Get the frame wrong and nothing sits flat. The art is in the frame, not the module handling.
Frame + Magnetic Modules — the Workhorse Path
This is how the overwhelming majority of permanent flexible LED installations are built. It works for indoor curved walls, column wraps, wave backdrops, and architectural surfaces.
Step 1: Fabricate a steel frame to the exact curve radius — this is a welding job, done once per project. Any local metal fabricator can make it from our CAD drawing. Step 2: Bolt the frame to the wall or column. Step 3: Route power and data cables behind the frame (separated by ≥50mm to prevent interference). Step 4: Snap modules onto the frame with the pre-installed neodymium magnets — up to 28 per module. No tools. No screws. Alignment pins on every module edge register each module to its neighbor automatically. Step 5: Connect ribbon cables between modules, load the config file from our USB drive, and run the test pattern.
The magnetic system is what makes this faster than you expect. Each module’s magnets are height-adjustable by rotation, so if the welded frame has a 1–2mm wave in it, you compensate at the module level instead of re-welding the steel. For iron frames — which are standard for flexible LED because of the bending requirement — thin adjustment shims under the modules at the frame contact points are standard practice to achieve a perfectly flat display surface. This is not a manufacturing defect. It’s how every curved project in the industry achieves sub-millimeter flatness on a frame that was welded, not machined.
A 10m² curved wall installation typically takes two people, one day for module mounting. The frame fabrication is the longer lead item (3–7 days locally, or we ship it pre-fabricated with the modules).
Portugal P1.5 GOB Cylinder — Path A Executed

A retail project in Lisbon required a 360° LED cylinder wrapping a 1.53-meter diameter architectural column, 3.2 meters tall. Fine-pitch P1.5 GOB modules on 240×120mm form factors.
10 modules per ring · ~15.4m² display area · 240×120mm module size · P1.5 GOB pixel pitch · Lisbon, Portugal
Ten 240×120mm modules formed each ring around the cylinder. The steel frame was fabricated to a 1,530mm diameter in advance. On site, the frame was bolted into position in under an hour. All 10 modules per ring snapped on magnetically — total module mounting time across the full 3.2-meter height was under 3 hours. GOB protection was critical: the cylinder sits in a public retail space with close pedestrian traffic, and P1.5 modules in fine-pitch are vulnerable to accidental contact during cleaning. Read the full case study.
Pre-assembled Cabinets — the Simplest Path Most Buyers Don’t Know About
If Path A still sounds like too much site work, Path B eliminates almost all of it. The factory pre-assembles flexible modules into curved cabinets — a rigid aluminum or steel housing that holds multiple modules in a pre-aligned curved configuration. The cabinets arrive ready to connect.
No frame to weld on site. No individual module handling. No shimming. No alignment. A cabinet arrives pre-curved, pre-wired, and pre-tested. You bolt cabinet to cabinet on site with the quick-lock mechanism, connect power and signal between cabinets, and you’re done. Each cabinet might hold 4, 6, or 8 modules in a factory-aligned curve — you’re moving pieces that are 500×500mm or larger, not 240×120mm.
This is the path for projects that need to go up fast with minimal skilled labor on site — rental deployments, event builds, pop-up retail, and immersive installations where the construction window is measured in hours, not days. It costs more than Path A because the factory does more of the work, but the trade-off is that you send a smaller, less specialized crew to the site.
US Immersive LED Tunnel — Path B Executed

An immersive attraction in a major US city needed an LED tunnel — walls and ceiling covered in curved LED surfaces that surround the viewer in a continuous digital environment. Flexible modules on pre-assembled cabinets made this buildable.
Flexible cabinets pre-assembled · Tunnel format walls + ceiling · US installation
Rather than building a curved steel frame on site and mounting individual modules, the factory pre-assembled flexible LED modules into rigid curved cabinets. Each cabinet was pre-wired, pre-tested, and shipped as a single unit. On site, the installation team simply bolted cabinets together along the tunnel path and connected power and signal between them. What could have been weeks of on-site frame fabrication became a few days of cabinet-level assembly. Read the full case study.
How to Choose Between Path A and Path B
Steel frame fabricated to the curve, modules snap on with magnets. Lower hardware cost, more site work.
- Lower upfront module cost
- Frame fabricated locally (or factory-shipped)
- 2 people, 1 day for ~10m² module mounting
- Ideal for permanent installations
- Requires metal fabrication access on site
Factory pre-curved, pre-wired, pre-tested cabinets bolt together on site. Higher hardware cost, minimal site work.
- Zero module-level work on site
- Cabinets arrive ready to connect
- 1–2 people can assemble a tunnel in days
- Ideal for rental, events, tight schedules
- Higher per-square-meter cost
If the installation is permanent and you have access to a local metal fabricator: go Path A. If you’re deploying for an event, a rental, or a tight construction window: go Path B. If you’re unsure, send us the space dimensions and a photo and we’ll recommend the right path with a line-item quote for both options.
What You DON’T Need to Worry About
Here’s what clients fear versus what’s actually required:
Reality: Modules arrive pre-tested in their curved configuration from the factory. They’ve already passed 72 hours of continuous aging in the bent state. You’re not the first person to flex them.
Reality: Every module has alignment pins on all four edges. When you snap a module next to its neighbor, the pins register it to within a fraction of a millimeter automatically. This isn’t a skill — it’s a mechanical feature.
Reality: The frame fabricator is a standard metal shop doing standard welding — any competent fabricator can work from our CAD drawing. The module mounting is a two-person job that most AV integrators can do after watching a 15-minute video. For Path B, it’s even simpler: bolt cabinet to cabinet, connect cables, done.
Reality: Height-adjustable magnets on every module compensate for small surface variations. Thin shims under modules at frame contact points handle the rest. In 19 years we’ve never seen a curved frame that was perfectly true on first weld — shimming is standard practice, not a sign of a problem.
Assembly Questions We Get From Every Project
How long does it actually take to mount flexible LED modules?
For Path A (magnetic snap-on), two people can mount approximately 5–8m² of modules per hour once the frame is in place. A 10m² curved wall takes about a day. The frame fabrication is the longer lead item — 3–7 days at a local metal shop — not the module mounting. For Path B (pre-assembled cabinets), cabinet-to-cabinet assembly can cover 20–30m² per day with two people.
Do I need a specialist metal fabricator for the curved frame?
No. The frame is standard steel sections bent or welded to a specific radius. Any competent metal fabrication shop can produce it from a CAD drawing we supply. If you’d prefer not to manage frame fabrication locally, DOIT VISION ships the frame pre-fabricated along with the modules.
What’s the minimum skill level needed to install a flexible LED display?
For Path A: one person familiar with basic metal fabrication (reading a CAD drawing, drilling anchor holes, bolting a frame to a wall), and one person to handle modules. Neither needs previous LED experience — the config file pre-loads all calibration data. For Path B: a general AV installation crew. Cabinets bolt together with quick-lock mechanisms; signal and power connections are labeled and keyed.
What if the modules don’t line up perfectly at the seams?
Alignment pins on every module edge physically prevent misalignment. When two modules meet, the pins force their edges into registration to within a fraction of a millimeter. If a module appears out of alignment, the frame behind it is slightly off — rotate the height-adjustable magnets or add a thin shim, and it snaps into place. This adjustment takes seconds per module and is part of the standard installation checklist.
How do I fix the modules to the structure — magnets, glue, or screws?
Magnets are the default for Path A: up to 28 neodymium magnets per module snap directly onto a steel frame. This is the fastest method and the easiest for front-access maintenance. Screws are used when the frame material is non-magnetic (aluminum or wood) — modules have mounting holes for M3 screws. Structural adhesive (industrial epoxy) is used for permanent installations where access behind the display is impossible — but this is rare, as it makes module replacement extremely difficult. The choice depends on your frame material and maintenance access requirements.
Can I take the display down and move it to another location?
Path A (frame + magnetic modules): the modules can be removed from the front with a suction cup tool, but they’re engineered to conform to a specific curve radius. Re-using them on a wall of the same curve is feasible; re-bending them to a different radius is not and voids warranty. Path B (cabinets): cabinets are designed to be transported and re-deployed, making this the correct choice for rental, touring, and event applications.
What if a module fails after installation?
Front-access magnetic mounting means a failed module is replaced in under 30 seconds with the included suction cup tool. Pop the module off from the front, disconnect the ribbon cable, connect the new module, snap it back on. No disassembly of the structure, no access behind the wall. We ship every order with 3–5% spare modules included in the price for this reason. Warranty covers LED failure, module delamination, and control system defects for 2 years.
Which path is cheaper?
Path A (frame + magnetic modules) has a lower per-square-meter hardware cost because the factory does less pre-assembly. The trade-off is more site labor for frame fabrication and module mounting. Path B (pre-assembled cabinets) costs more per square meter but saves on site labor — the factory does the alignment, wiring, and testing. For a permanent installation with access to local fabrication, Path A is usually the better value. For an event with a 3-day build window, Path B’s higher hardware cost is offset by avoiding overtime labor and specialist travel.
Want to understand the two assembly paths with real project breakdowns? Read the complete Portugal P1.5 GOB cylinder case study for Path A details and the US immersive LED tunnel case study for Path B details. For a custom assembly recommendation on your project, WhatsApp a photo of your space — we’ll tell you which path fits within 24 hours.
19 years in LED display engineering. I’ve stood inside factories watching modules get mounted and on construction sites fixing frames that were welded 3mm off. Every assembly step described here is something I’ve either done myself or supervised. If your project has a curve we haven’t seen before, I’m the person who signs off the feasibility drawing.
A photo of the wall or column, the dimensions, and whether you have access to a metal fabricator. We’ll recommend Path A or Path B with a full assembly timeline, module list, and a line-item quotation.